Cecily Margaret Guido (Peggy Piggott)

Books and movies, like The Dig (author John Preston and director Simon Stone), reintroduce us to people in our archaeological history that have either been forgotten or downplayed by societal norms of the time. They encourage us to dig into the past to discover who these people were, and how they contributed to the advancement of our field. Cecily Margaret Guido, or Peggy Piggott, as she was known at the time of the Sutton Hoo excavations in 1939, was in the right place at the right time. She discovered the first item of the large collection of artifacts from the famous ship burial. But this was was such a small snippet of a long and productive career. Peggy was a very busy woman!

Lily James plays Peggy Piggott in the new film The Dig

Margaret Guido (b. August 5, 1912, d. September 8, 1994) was an English archaeologist known for methods, field-leading research into prehistoric settlements, burial traditions, and artifact studies. Her career spanned sixty years, and was defined by high field standards, and rapid, high-quality publications. At the time of the Sutton Hoo discovery in 1939, she was already an accomplished archaeologist with plenty of fieldwork experience, and not as inexperienced or “bumbling” as portrayed in the The Dig. In 1933 she excavated under the tutelage of Mortimer and Tessa Verney Wheeler, at the Roman town, Verulamium (Hertfordshire, England). In 1934 she earned a “diploma” from the University of Cambridge, as they did not award degrees to women at the time. By 1936, she had completed a post-graduate diploma from the Institute of Archaeology in London, where she focused on Western European Prehistory. In 1937, at the age of 25, she directed an excavation at the Latch Farm (Hampshire) Middle Bronze Age barrow and urnfield cemetery, wrote up the excavation of an Early Iron Age site at Southcote (Berkshire), and published a study on the pottery from Iron Age Theale. In 1938-39 she worked on research excavations at the Early Iron Age site of Little Woodbury (Wiltshire), and published the results of work conducted at the Early Iron Age site at Langton Matravers (Dorset).

Original photograph by Barbara Wagstaff © Trustees of the British Museum, digital image © National Trusthttps://www.nationaltrust.org.uk/blogs/archaeologists-blog/personal-reflections-on-the-digs-and-discoveries-at-sutton-hoo

In July 1939, Guido and her then husband, Stuart Piggott, arrived at the Sutton Hoo location to aid Charles Phillips, who had assumed control of the excavations under the British Museum, the Office of Works, Cambridge University, Ipswich Museum, and the Suffolk Institute. On July 21, not long after her arrival at site, Guido had discovered the first of 263 items that confirmed the ship was a burial mound, and that the Anglo-Saxon Dark Ages were in fact a rich cultural period.

https://en.wikipedia.org/wiki/Sutton_Hoo_helmet

Over the next two decades, Guido’s work forged her into one of the most important British prehistorians. She conducted extensive excavations at six hillforts, excavated for the Ministry of Works during WWII, and produced approximately fifty publications for British Prehistory which advanced the fields of Bronze Age burial traditions, Late Bronze Age artifact studies, Later Bronze Age and Iron Age settlement studies (especially roundhouse architecture and hillfort chronologies). Later in her career she produced the definitive texts on Prehistoric, Roman, and Anglo-Saxon glass beads that are still used today. By the age of 32 she was elected a Fellow of the Society of Antiquaries of London due to her contributions to the study of British prehistory. In 1987 she was President of the Wiltshire Archaeological and Natural History Society, a position she held until her death at the age of 82.

Her work on hillfort studies (both field methods and interpretations) are some of the most influential work on the understanding of early British prehistory. In 1948 she excavated Hownam Rings, Hayhope Knowe in 1949, and Bonchester Hill in 1950, and published the results within the same year. The field methods she used at Hayhope Knowe was a combination of the best parts of the Wheeler and Bersu schools of excavation, but modified to allow for quick assessment. This was the first time these were used on northern Iron age sites. As a result, in one season Guido was able to open 520 sq. m in targeted open-area trenches, which were used to investigate three houses and their enclosure sequence.

Hayhope Know Excavation map – Fig. 9 from “The Iron Age Settlement at Hayhope Knowe, Roxburghshire. Excavations 1949. By C.M. Piggott, Proceedings of the Society of Antiquaries of Scotland, 1951.

Hownam Rings became the type-site for hillfort development, known as the Hownam Paradigm. The paradigm indicated that the progressing complexity of enclosures (pallisade to multivallate earthworks) also represented complexity of cultural development. This paradigm remains valid to this day. Guido also used this site to discuss for the first time the problems of archaeological survival, slope erosion, and the vestigial nature of timber features. She also tested and refined the CBA model, allowing her to provide a relative chronological framework for later prehistoric settlement in southern Scotland. This was a major leap for prehistoric studies in the days before the use of radiocarbon dating became prevalent.

In the later part of her career in the 70s and 80s, Guido focused on researching ancient British glass beads. Her first volume covered both prehistoric and Roman period beads, and the second volume (published posthumously by Martin Welch in 1999) on Anglo-Saxon beads. She co-founded the Bead Study Trust (in 1981), and the Peggy Guido Fund for research on beads. Both volumes remain the primary reference works on the topic.

If you want to read more about the works of Margaret Guido, check out the following links!

https://peoplepill.com/people/margaret-guido/

https://trowelblazers.com/raising-horizons-queens-of-the-castles/

https://en.wikipedia.org/wiki/Margaret_Guido

Top 10 Sites of 2019!

We are heading into the fall of 2020 and the season crunch is in full swing! We have been pretty busy, despite the challenges of COVID-19, and have found quite a few new and exciting sites. This makes us recall the sites of 2019! It was hard to make time to write up what we found in 2019. Although we find over 100 sites every year, these sites stand out either because we found interesting artifacts or the site is unique in some way.

Locations of the Top Ten Sites of 2019

GgPs-6: Found while assessing a proposed cutblock for Vanderwell Contractors near Swan Hills, AB. The site is located on an irregular ridge surrounded by muskeg and set back from a small lake. At this site we found an asymmetrical projectile point made of quartzite. The projectile point doesn’t fit any of the established diagnostic styles known in Alberta, but could possibly be a hafted knife similar to this knife we found back in 2014.

FgPw-21: Found while assessing a proposed cutblock for Weyerhaeuser Pembina Timberlands near the Brazeau Reservoir. The site is located on prominent hill surrounded by muskeg. At this site we found a small biface made of purple quartzite and a utilized Knife River Flint flake. The biface appears to have been resharpened in the past and was likely once much larger. The tool was likely discarded once the flintknapper felt the tool became exhausted and unusable. The flake of Knife River Flint, is an exotic material that comes from a source in the Dakotas. Along the sharp edges of the flake, small chips we call utilization scars or wear was observed. Sometimes all a person needs is a sharp flake to get the job done!

GgPs-10: Found while assessing a proposed cutblock for Vanderwell Contractors near Swan Hills, AB. The site is located on an irregular knoll overlooking muskeg to the south. Usually we find 1-10 flakes in shovel test, which we interpret as hitting the periphery of a flintknapping scatter likely associated with a single tool production event. Sometimes we get a positive test with 30-50 flakes in a shovel test and feel we hit the knapping area dead-on. If multiple lithic materials are present it likely represents various tool production events. But at this site we hit a full-on lithic workshop! We recovered four hammerstones, five cores, and a total of 7888 flakes!

GiPk-3: Found while assessing a proposed cutblock for Vanderwell Contractors near the Fawcett River. The site is located on a small knoll located southwest of the river and overlooking a wetland to the south. Although we only found one artifact at this site, it is a very interesting tool. The tool is a portion of an obsidian flake made using microblade core technology. The blade has some utilization wear along the lateral edges, as indicated in the picture above. As we have discussed before, obsidian is a volcanic glass and each volcano has a unique chemical signature that allows us to trace where the artifact material came from. We were able to zap this specimen with the pXRF and discovered this obsidian came from over 1700 km from Mount Edziza in British Columbia!

FiPx-5: Found while assessing a proposed cutblock for Blue Ridge Lumber near Niton Junction, AB. The site is located on a long ridge that comes to a high point in the southeast. At this site we found a 90 m long site with flakes, cores, and one ugly projectile point. The projectile point might represent an aborted point that the flintknapper discarded. One of the lateral edges and the one of the notches are broken off, which may represent an error during tool production which resulted in the tool being discarded.

FiPx-2: Found while assessing a proposed cutblock for Blue Ridge Lumber near Niton Junction, AB. At this site we found lithic debitage, two cores and one bone awl. The bone awl is somewhat degraded and the point is not very sharp, but it appears to have been sharpened into a point at one end. The awl would have been used to pierce and mark materials such as leather and wood.

GdPu-19: Found while assessing a proposed cutblock for Blue Ridge Lumber near Swan Hills, AB. The site is located on a low southeast facing edge overlooking a relict oxbow. Although we didn’t find much lithic debitage at this site, we found two hearths (old campfires), 54 pieces of faunal remains (animal bones), and lots of charcoal. Two of the animal bones have indicators of human modification in the form of cutmarks, polish, and spiral fractures. The charcoal from both hearths and the calcined bone were all sent away for radiocarbon testing and received dates of: Charcoal Calibrated AD (1495-1650 AD); calcined bone Calibrated AD (1681-1937 AD). While not very old, this site is interesting in that it was occupied just prior to European Contact in Alberta!

FcPx-39: Found while assessing a proposed cutblock for Sundre Forest Products near Nordegg, AB. The site is located on a west-facing terrace overlooking Dutch Creek. At this site, we found a beautiful siltstone biface preform. Much like GiPk-3 and other sites where we only find one formed tool, these sites likely represent a tool being dropped or lost by hunter or flintknapper.

FcPx-50: Found while assessing a proposed cutblock for Sundre Forest Products near Nordegg, AB. This site is located on a series of rolling hills overlooking the North Saskatchewan River. At this site we found one biface and 15 pieces of lithic debitage. The biface is made from Red Deer Mudstone, also known as Paskapoo Chert, is a material we do not find often. Additionally, we also found one piece of obsidian which was sourced to Bear Gulch, Idaho.

FcPx-49: Found while assessing a proposed cutblock for Sundre Forest Products near Nordegg, AB. This site is located on a large prominent ridge located back from a deeply-incised stream. At this site we had 12 positive tests over 170 x 75 m area. In these positive tests, we found one siltstone biface, two cores, one animal bone, and over 1000+ flakes. Several of the flakes also showed signs of utilization wear.

What’s in Your Bag?

Gear choice can have a big effect on your comfort level and efficiency while working in the forest. New workers, may have never been in the field and may not know what you really need to take for a full 12 hour day in the boreal forest. We expect to spend the entire day away from motorized vehicles so we need carry in everything needed for the day by hand, backpack, or vest. And if you don’t want to feel like your carrying around the kitchen sink, you need to be very selective in what you pack!

There are three basic categories I have on me at all times: archaeological (A), safety (S), and personal (P). The archaeological items are what I need to do the job. The safety are what I need to stay safe, and to meet the OHS Regulations in Alberta. The rest is what I need to enjoy/tolerate my day. These are not always mutually exclusive. For example, I need a radio to communicate with co-workers about the survey we are doing, but also in case of an emergency.

Time of year is also a factor. In spring, crews have encountered snow, rain, and sun all in the same day. Changing weather conditions may allow some items to be dropped, but other things, such as warm gloves, may need to be added. I never leave my rain gear behind, and also carry a survival kit and warm clothes, just in case I end up stranded overnight in the bush.

Load bearing equipment is an important consideration. I personally wear a True North Vest, but others may prefer a more traditional cruise vest. Many companies produce quality backpacks, but not all companies have the same level of warranty. Companies such as Osprey, make a durable lightweight backpack and fully stand behind their product with a stellar warranty. I prefer a 35-45 litre backpack as this size pack fits nicely inside our screens and gives me room for all my gear with a bit of extra space to put extra layers as the temperature rises. Make sure that you get a bag with a rain-cover. Most good bags come with one.

Keep in mind that I generally carry more stuff than most people, but I like to be prepared and don’t mind the weight. Adjust gear accordingly, and try to decide whether you really need something or not.

Things In My Vest

IMG_20200429_130349
All of this fits into the various pockets of the TrueNorth vest. A combination of safety and archaeology specific equipment.

  • iPad Mini (A, S)
    • Tethered to a Bluetooth GPS we use this for data collection, navigation, safety documentation.
  • In-Reach/Bluetooth GPS (A, S)
    • Emergency satellite communication device that increases the accuracy of the iPad’s location.
  • Handheld GPS (A, S)
    • Navigation, important waypoints (truck, quads etc.) data backup (shovel test locations).
  • VHF Radio (A, S)
    • Communication with co-workers and other crews. Great for notifying other nearby workers of hazards, or when we found a site!
  • Compass (A, S)
    • Navigation and orienteering. GPS are notoriously bad at telling you which way is north.
  • Tape measure (A)
    • Measuring shovel test depth. Scale for photography.
  • Pen and Sharpie (A)
    • Always need writing implements
  • Artifact Bags and Tags (A)
    • For  storing artifacts and labeling them with their provenience.
  • Gloves (S)
    • I keep the gloves I am using in my vest. Screening destroys gloves fast so I keep extras in my bag.
  • Multi-tool (S, P)
    • I keep my multi-tool in my vest so I have quick access to it if the need arises.

Things In My Bag:

IMG_20200429_131601
Definitely more than in the vest! Many of these is “just in case” items we hope we won’t need, but could safe your life if conditions change. They are useless if they are left in the truck 3 hours away.

  • Water (S, P)
    • Bladder for hiking and Nalgene bottles for lunch and reserve. I find that I go through a lot of water, but may leave some at the quad if I know I will not need it. Very import to have extra if it is hot outside!
  • Food (S, P)
    • Enough food for the day and a little extra just in case you have to spend the night in the forest. I usually have 3 or 4 Cliff Bars squirreled away somewhere.
  • Knife (A, S, P)
    • Never go into the bush without one. Check out this blog if unsure about which type of knife is best to have.
  • Bear Spray (S)
    • Should never go into areas with bears undefended. It is always a good idea to have a Bear Awareness training before wandering into their backyard. I attach the holster to my bag when on the ATV, but put it on my belt when hiking.
  • Rain Gear (S, P)
    • I never leave my rain gear behind even if the forecast looks good. Our weather is too unpredictable and I rather have it and not need it, than need it and not have it.
  • Head lamp
    • Small, lightweight form of illumination. It can get dark quick in the fall, and it sucks stumbling around the forest in the dark.
  • First Aid Kit (S)
    • Everyone at Tree Time Services Inc. carries a Type P (Personal) first aid kit and supervisors carry a Type 1.
  • Neck Brace (S)
    • I never ever want to have to use this! I will carry it regardless as it could be the difference between life and death.
  • Survival Kit (S, P)
    • I carry a small survival kit with some basic supplies just in case. I don’t plan on having to survive for more than a night without help. It all fits in a Nalgene, which keeps it waterproof. Bonus extra water container! It includes:
      • Extra knife
      • Mirror
      • Whistle
      • Small bundle of paracord
      • Fire starter
      • Bic lighter
      • Water purification tablets
      • Small plastic sheet
      • Cliff bar
  • Extra Clothes/Gloves (S, P)
    • Never know when you may need extra dry clothes or an emergency thermal layer. Extra warm clothing is useless wet, so I keep it dry bags. I bring:
      • Lightweight thermal baselayer
      • Extra warm gloves
      • Socks
      • Extra Bama socks
      • Buff or neckwarmer
      • Lightweight belaclava
        • Particularly important for cold quad rides
  • Bug Spray/Sunscreen (S, P)
    • For when the bugs get bad and the sun is out!
  • Toilet paper (P)
    • No explanation needed. Unless you really want the full nature experience of using leaves and moss.
  • Axe file (A, P)
    • For sharpening shovels and trowels. I hate a dull shovel. Most people sharpen at the truck and leave the file behind.
  • Trowel (A)
    • I usually only bring this on excavation jobs.
  • Bungie-cord (A, P)
    • I use this to attach my screen to my backpack.

Other Items:

  • Cellphone (S, P)
    • (Not pictured) I always keep my phone sealed in a ziplock bag and secured in my vest so that it cannot get damaged or lost.
  • Portable battery charger and Extra Batteries (A, S, P)
    • Can’t do much if our electronics don’t work
  • Flagging (A, S)
    • Always need multiple different colors of flagging for marking hazards, shovel tests and flagging site buffers.
  • Bug net (S, P)
    • Most people will carry a bug net either in their vest or bag depending on how much they use it. Bugs in the boreal can get pretty terrible at times.
  • Collapsible hand saw (A, S, P)
    • For clearing trails or roots out of test pits

Along with all of this we also need to carry a screen and shovel! Most people attach the screen to their backpack and everyone has their preference of shovel. Check out these shovel reviews (Grizzly vs. King of Spades, Bulldog spades) to determine what type you may like best! Enjoy your summer and happy hiking!

No volcanoes in Alberta, so where does the Obsidian come from?

When working close to an obsidian source (i.e. volcanoes), archaeologist will regularely find obsidian tools and debitage. However, in the boreal forests of northern Alberta, obsidian is a rare find indeed. So to find any evidence of it at all is pretty significant. Volcanic glass, or obsidian, is one of the sharpest naturally occurring materials on earth. It is sometimes used by surgeons who require a cutting edge that is much thinner and sharper than a stainless steel scalpel. Not only is obsidian extremely sharp, but it is also relatively easy to flint knap and is used by many beginners trying to learn this ancient skill. These features made obsidian a highly valued knapping material.

Pre-contact peoples fashioned various tool types from it, such as knives, projectile points, or composite tools. One method of knapping obsidian was blade core technology. This method involves preparing an obsidian core so that a series of small blades can be removed. This method minimizes the amount of material that is wasted and allowed people to quickly reproduce blades that were a similar size and shape. These blades were then hafted to a bone or stick to create a cutting utensil. To create larger tools, obsidian would have been knapped using normal methods as well.

Obsidian blade and core
Photo credit: B. Bernard

Last summer, Tim and I were surveying some forestry cutblocks at the base of the southern slopes of the Marten Hills, east Slave Lake. During the screening process, I had targeted a series of small knolls that overlooked a muskeg. These knolls were close to the headwaters of the Fawcett River, where a natural pass would have allowed people to easily traverse through the hills. Tim and I walked to the top of the highest knoll and started digging test pits.

Brian at GiPk-3 - Copy
Brian at the GiPk-3 hill top

We were completely shocked when my first test contained an obsidian blade. At this point we were extremely excited, and were sure that we had just found a crazy site. However, even though we dug 40+ test pits, we never found another artifact. The site turned out to be an isolated find. Nuts!

obsidian blade

So if there are no volcanoes in Alberta, where did this obsidian blade come from? Luckily, advances in technology allowed us to quickly solve this question. During his Master’s degree, Tim obtained a license to operate a pXFR analyzer (portable X-Ray Fluorescence), so Tree Time Services Inc. rented one of these devices. Other obsidian artifacts recovered by Tree Time services were all found to come from south of the U.S. border. However, the results of Tim’s analysis suggests that the blade was made of obsidian from Mt. Edziza, British Columbia.

pXRF
Results of pXRF, showing range for various volcanic sources.

That means that this piece of stone had been transported/traded by Pre-contact peoples over a distance of 1700 km! At 10 km travelling distance in a day (on foot), that is 170 days, or almost 6 months. Mt. Edziza obsidian has never been found in the Lesser Slave Lake region, however is is somewhat common in the Peace Region in northwest Alberta. GiPk-3 represents one of the furthest known Mt Edziza obsidian finds from its source. Although Tim and I were disappointed that we didn’t find more artifacts, this single find provided evidence for trade networks that spanned vast distances long before European contact.

Edziza to GiPk-3
Image Credit: Todd Kristensen

Gear Guide – Knives

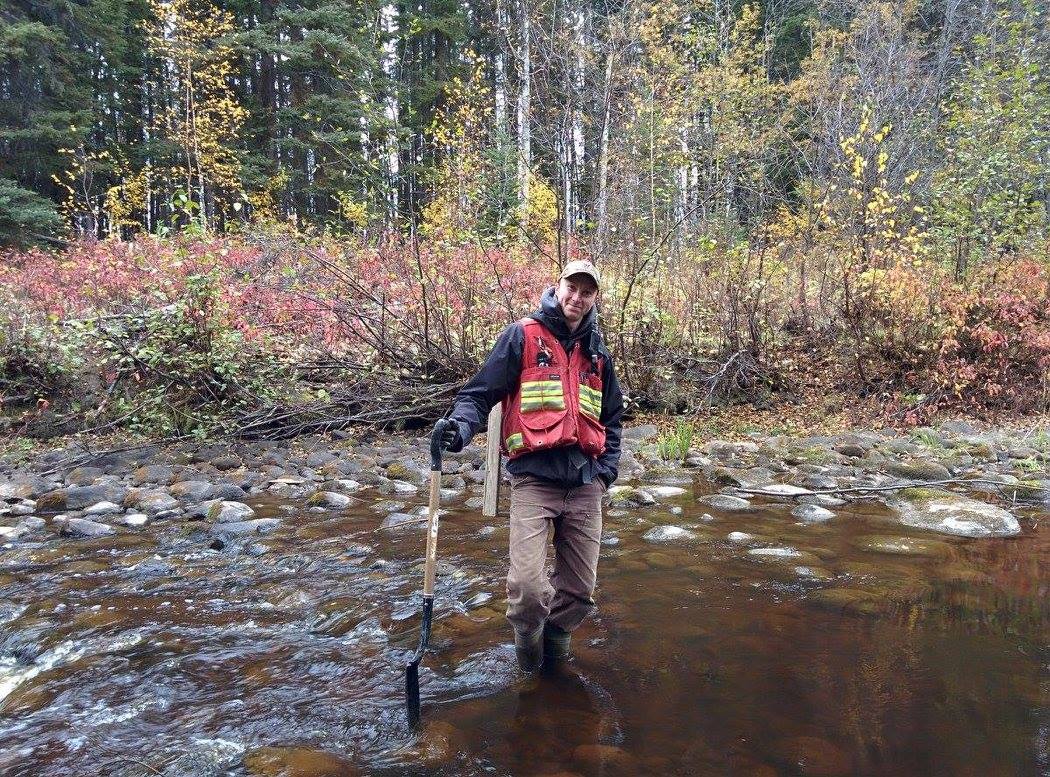
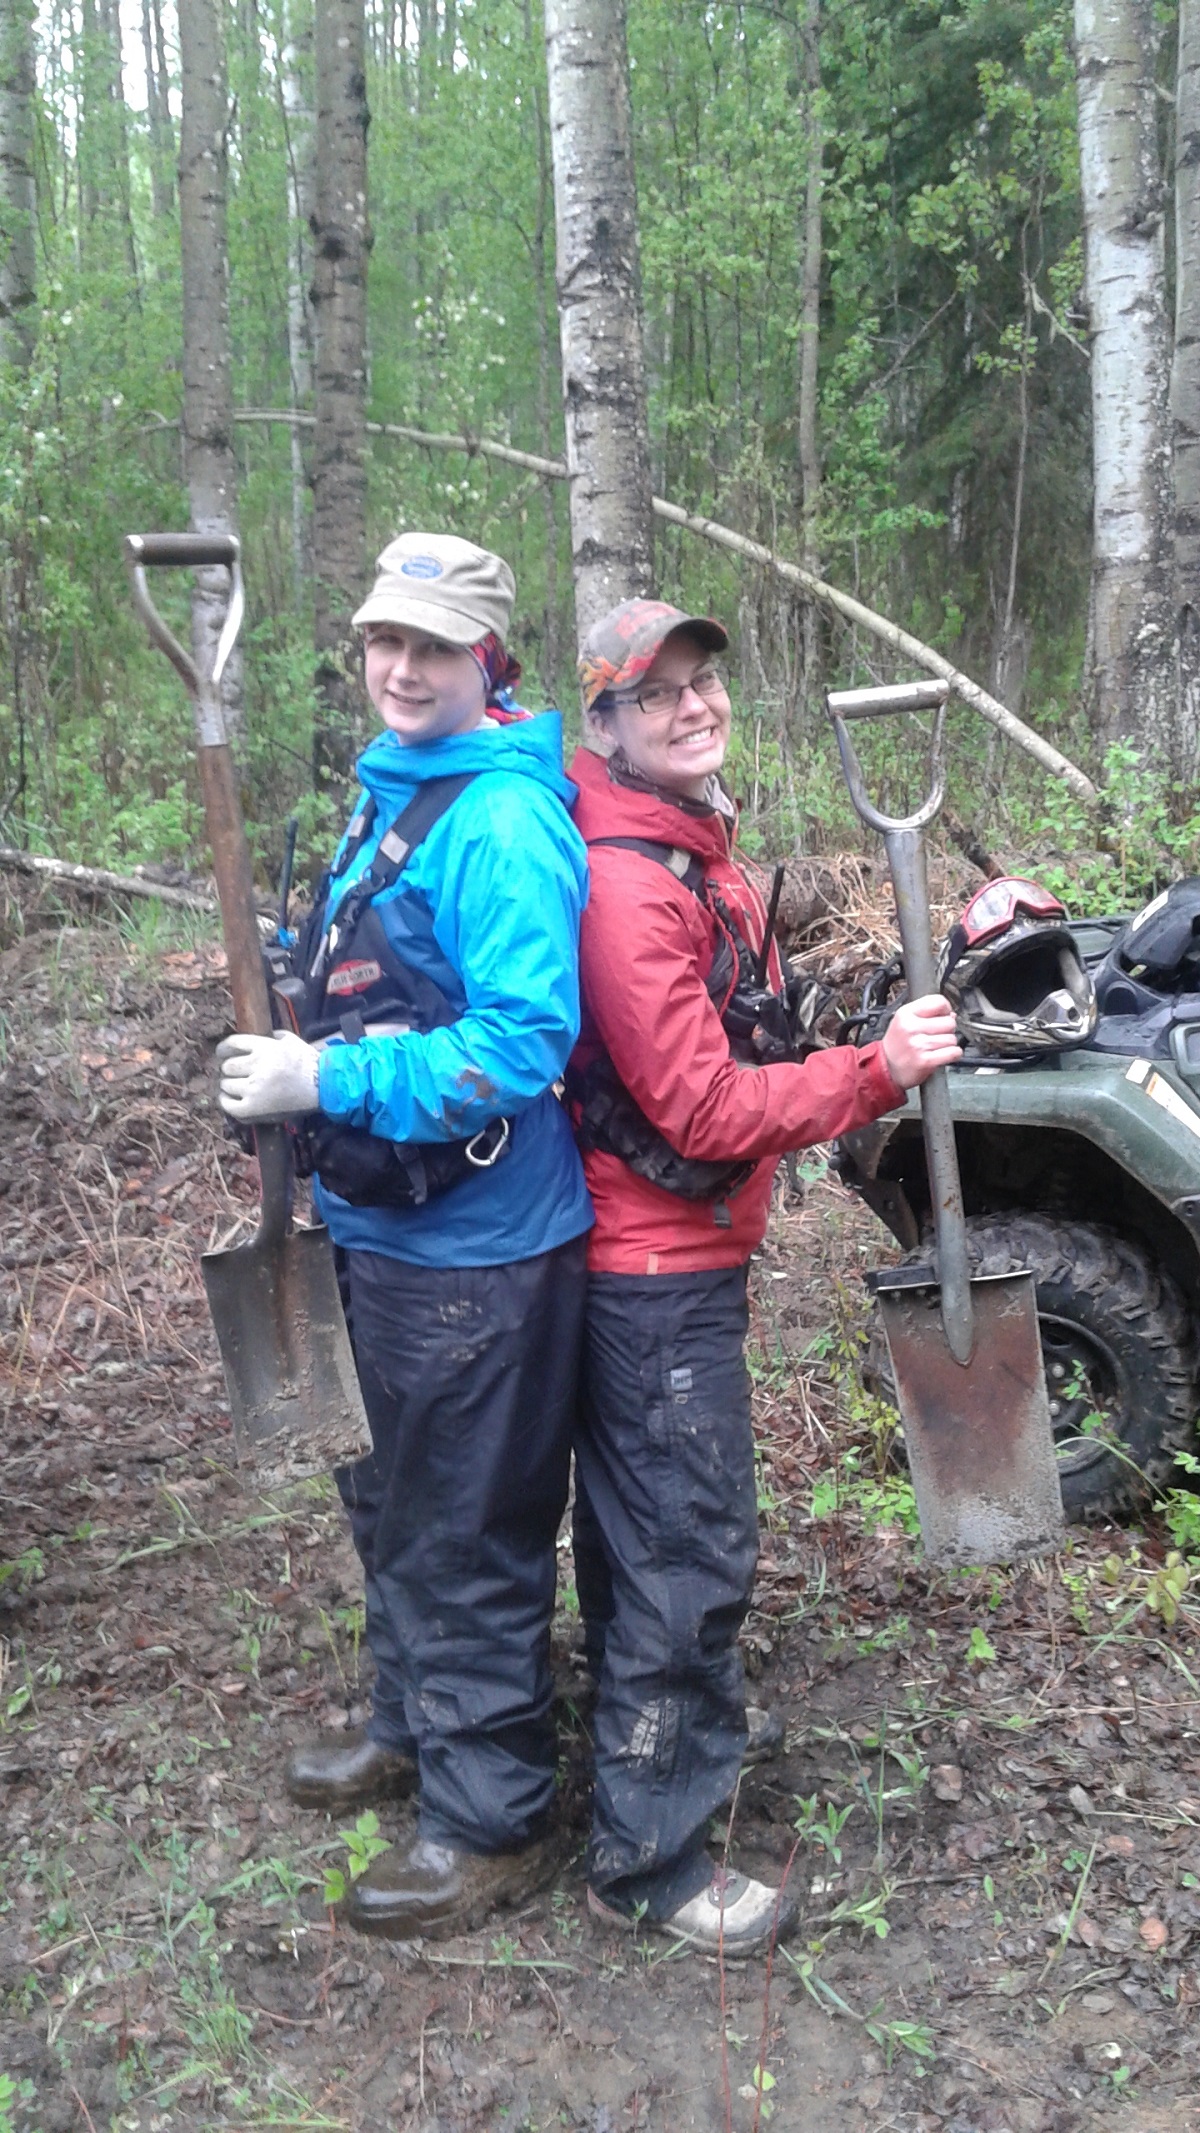
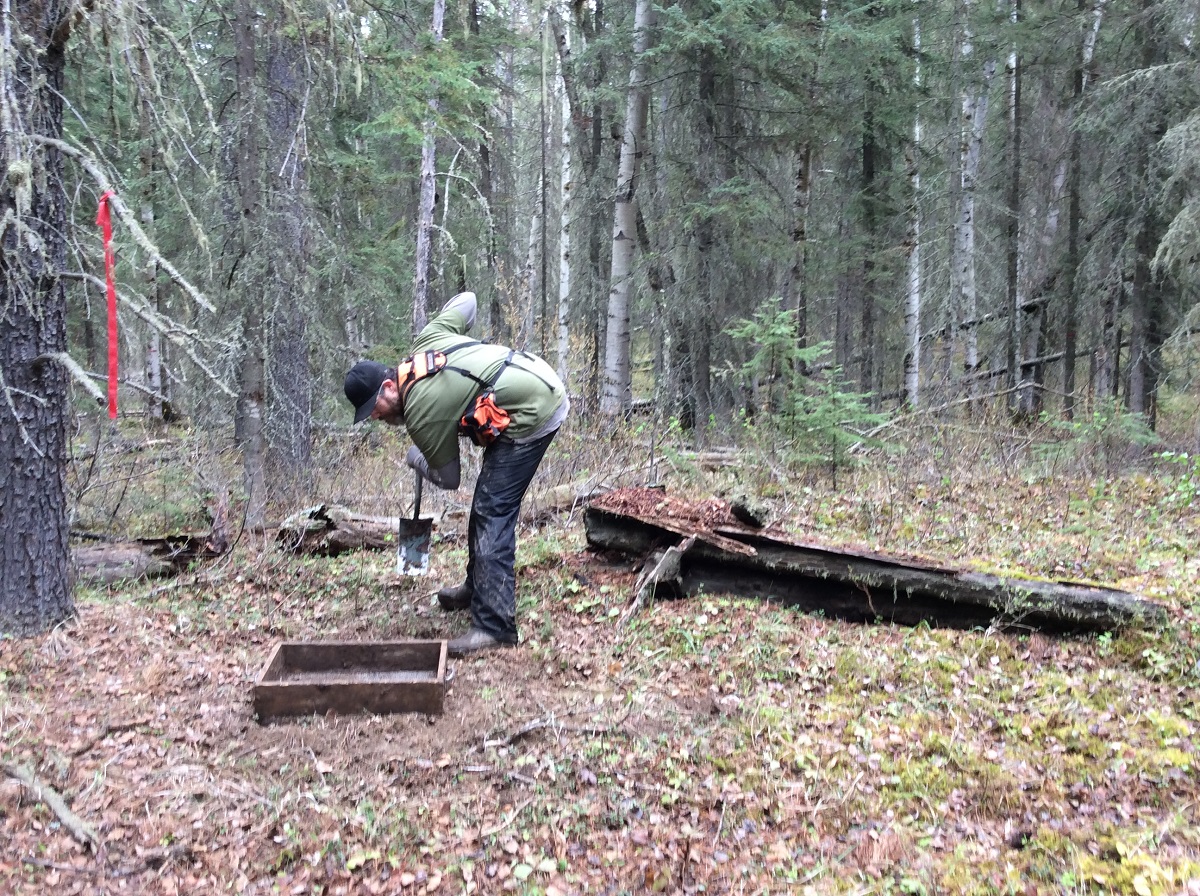
If you take a survival coarse, read outdoor living manuals like Northern Bush-craft, or talk to people who spend a great deal of time in the wilderness, one of the first items they suggest always having is a good knife. A good bush knife can be the difference between life and death in a survival scenario, much like a means of water purification and starting a fire (multiple BIC lighters is king!). When surveying the Boreal forest most of what we find are the remnants of First Nations Peoples making cutting implements out of stone. Unless you are an expert flint knapper, I would not recommend making stone tools in a survival situation and instead just follow the experts advice. However, with so many different types of knives on the market today, choosing which knife is best for you may be very daunting. So I asked the archaeological staff at Tree Time Services Inc. what type of knife they carry, why they carry that knife, and what they like/dislike about it? With this information, and my own personal experience, I wrote this guide on knives to share with our followers. Keep in mind, that not all clients allow knives on projects, so occasionally we have to leave them at home.

Folding Knives

Although I would not a consider a folding knife (a.k.a. pocket knife) the best choice for bush-craft, they do have certain qualities that make them quite useful when compared to other options. They key aspect that make folding knives a decent option is right in the name: they fold. Folding knives are the best type of knife for every day carry (EDC) because they are portable, usually lightweight, pack-able and easy to deploy like a Spyderco Paramilitary II. I would not buy a heavy or bulky folding knife. I want to put the knife in my pocket or pack and forget that it is there until I need it. I also would not buy a folding knife that cannot be operated with only one hand. Folding knife technology has advanced enough that knives that require two hands to open (or close) are now obsolete, but some people just fancy the more traditional style and aesthetic of a Buck 55 or Opinal #8. However, when buying any knife, especially folding knives, it is important to buy one that has a comfortable handle. While they may be aesthetically pleasing, many folding knives are very uncomfortable to hold and will cause hotspots and blisters during extended use.

The major downside to folding knives is that the fold is an inherent weak spot, which makes them far less durable than fixed blades, although perfectly adequate for small cutting tasks. Many people would choose lightweight and easy to carry over heavy and bulky. When doing archaeological survey, we have multiple means of communication (cellphone, radio, and In-Reach), and it is extremely unlikely that we would spend any longer than 24 hours stuck in the bush. Both Reid and Elenore think a pocket knife is perfectly adequate for what we do and don’t bother carrying a fixed blade knife. In my 10+ years of forest life, I have never been in a true survival situation, but I carry a fixed blade knife nonetheless, because I want to have it if I need it and I find it useful for tasks unsuited for a folding knife.

Fixed Blade Knives

When choosing a fixed blade over a folding knife, you need to decide whether you want portability or durability. Fixed-blade knives don’t fold, and therefore they need to be carried in a sheath on your belt or attached to a pack. While both types of knives are very proficient at cutting things (provided the edge is well maintained), fixed blade knives are much more versatile. They are universal tools that can be used for many things that would break a less durable folding knife. Digging holes, chopping down trees and cutting firewood, can all be done with a good fixed-blade knife, but would quickly destroy a folding knife. However, keep in mind that not all fixed blade knives are created equal, and a good bush-craft knife should have a full tang (the metal of the blade extends all the way to the base of the handle). This makes the knife substantially stronger than a knife that only has partial tang, or no tang at all, like those “Rambo”-style knives that have a hollow handle. Sure it may seem nice to be able to store matches and snare wire inside your knife, but that hollow-handle knife will break long before a full-tang knife will.

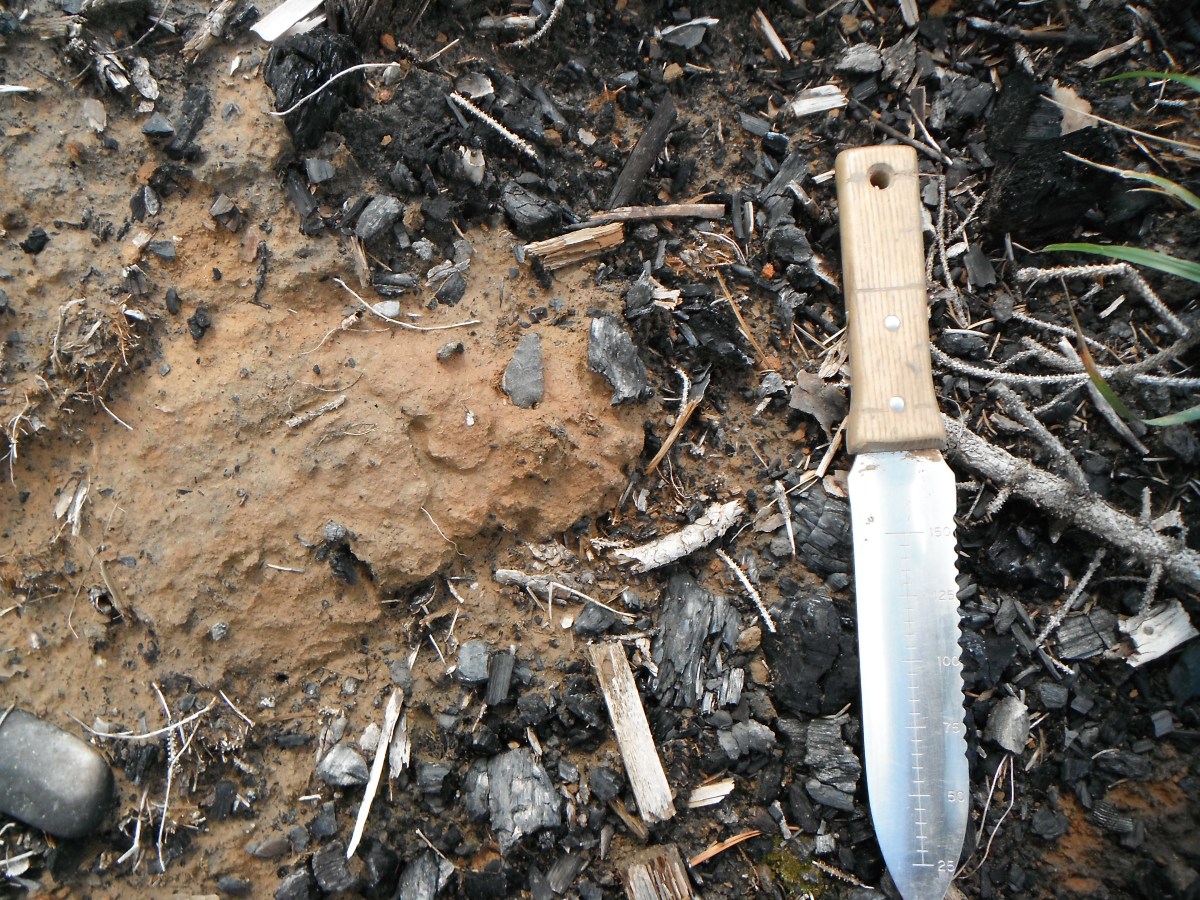
Before choosing which fixed-blade knife to buy, you need to decide what you will be using the knife for, and how much weight are you willing to carry? For instance, Tim carries a Gerber Vertebrae, which is small 3 inch, lightweight blade. In contrast, I carry a Ka-Bar, which is not small (7 inch blade) or lightweight, but I can use it as a small machete to clear helipads, cut roots out of test pits, and baton it through firewood with ease. However, when it comes to fine jobs requiring manual dexterity, the Gerber Vertebrae shines, while the Ka-Bar is just too big for precision cuts. Jay carries an older Gerber knife similar to the Gerber LMF-2 Infantry, which is probably a happy medium between what Tim and I carry. With a 5 inch blade, Jay’s knife is still light enough to be dexterous, while still being large enough to chop and baton.

Morakniv Companion

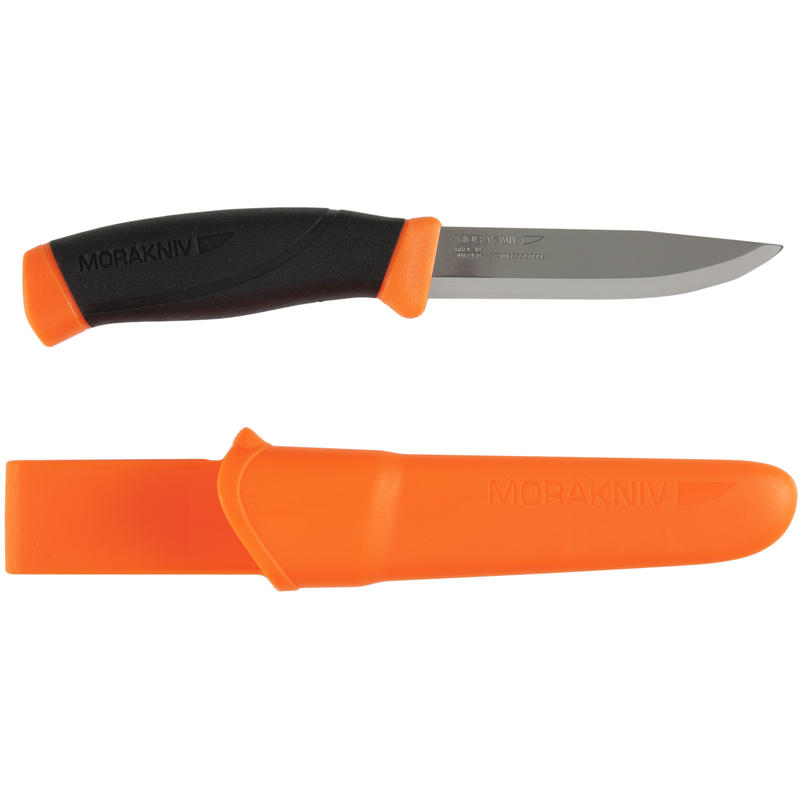
Vince carries the now discontinued Gerber Guardian, which is a double edged knife that is extremely cool, but not the most useful for anything other than Tactical Forest Operations. Vince admits that while two edges do not dull out as fast as one, his knife cannot baton through wood and is somewhat awkward to use since you can’t put your thumb on the spine while whittling. If price is a concern, but you still would like a good fixed-blade knife then look no further than the Morakniv Companion. These knives are very durable and come highly recommended by many outdoor and survival enthusiasts. Not to mention that you could buy 10 of them for the price I paid for my Spyderco Paramilitary II! Brittany lost her Morakniv Light My Fire this year and doesn’t seem to feel too bad about it.

Multi-tools

The usefulness of multi-tools is undeniable and most of the archaeologists at Tree Time carry one into the bush. Swiss Army knives are great, but Leatherman’s addition of pliers to the “boy scout knife” in the 1980’s changed the multi-tool forever. Since then the multi-tool market has exploded and many different variations with different types of tools are produced by many different manufactures. When buying a multi-tool it is important to keep in mind that when carrying gear through the forest all day “ounces become pounds”. Like other knives, you need to balance weight with usefulness. Ask yourself “do I really need that tiny pair of scissors when I am already carrying a multi-tool with two knife blades and a fixed-blade on my belt?”. Do this for every tool, and soon you will realize that a lightweight multi-tool with 10 functions is likely better. Sure it may seem like a good idea to get the Leatherman Surge with 21 different tools, but it also weighs in at a whopping 12.5 ounces, which is nearly a pound. Luckily many multi-tool manufactures have realized that weight is a concern for many people and have designed tools, such as the Leatherman Signal, with backpacking in mind.

Personally, I would refrain from getting a micro multi-tool like the Gerber Dime or Leatherman Micra. While these are extremely lightweight, I’ve always found that the pliers just don’t generate enough force and the knives just aren’t big enough. If force generation is a must, SOG recently designed the “Power-” line of multi-tools that have a mechanism the doubles the force applied to the pliers. Another important thing to consider when buying a multi-tool is whether you can access the tools with the pliers in the closed position and whether it can be operated one-handed. Like knives, not all multi-tools are created equal and it is important to do a bit of research before you buy a product to ensure you made the right choice.
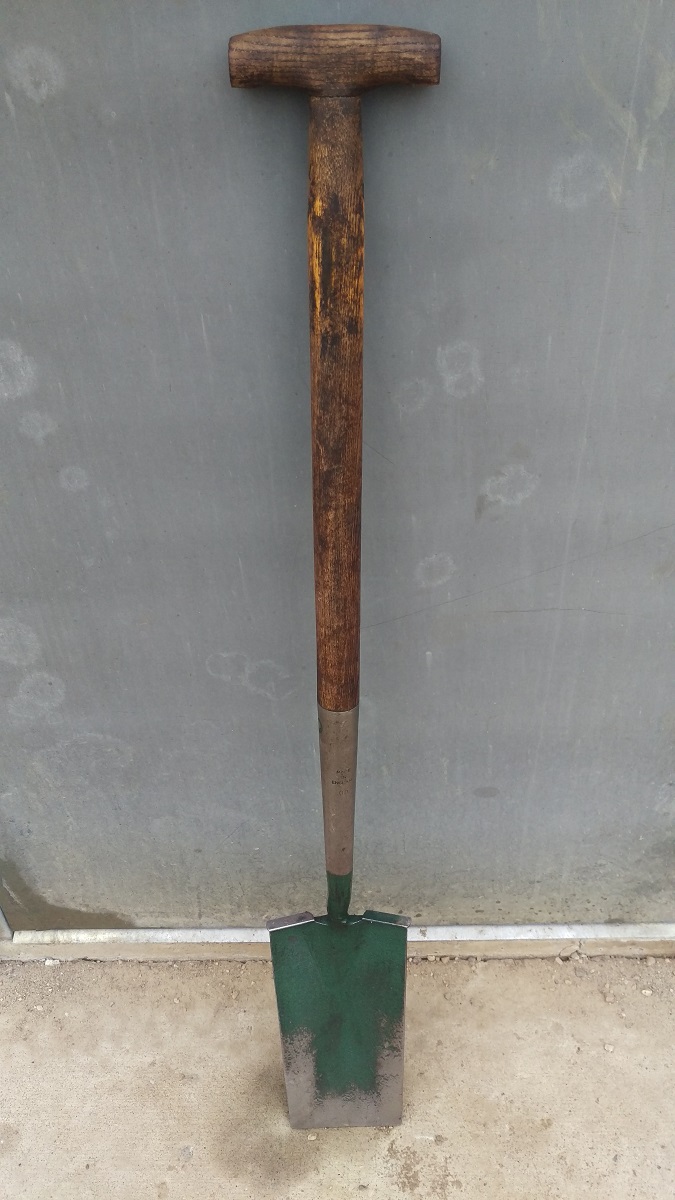
Digging Knives

While I like to carry a knife that I can use for digging if need be, Kurt likes to carry a knife that was especially designed for the task. When conducting archaeological survey, Kurt carries a folding knife, a multi-tool and a Hori Hori Knife. The Hori Hori knife is a Japanese knife that is part trowel, part knife and is traditionally used for gardening. The dished shaped knife features a serrated blade on one side and a straight blade on the other, although Kurt wishes these were reversed so that the straight blade faced down when held in the right hand. The Hori Hori knife is large enough to be used as a small machete, and is very useful for cutting sod, removing roots from test pits and troweling through tree throws. According to Kurt, the major downfall of the Hori Hori knife is that it does not have a full tang, and the blade becomes loose with heavy use. Since the handle is riveted, there is no way to tighten the handle once it slacks off. Kurt says he may replace the rivets with screws so that he can periodically tighten it up.

In the past, Kurt has also carried a Lesche knife, which is another knife designed primarily for digging and loved by the metal detector community. Although Kurt was fond of this knife, he says that he gave it up for the Hori Hori, due to the offset handle making it awkward to carry. Like trying to carry a trowel on your belt, the offset handle sticks out from your body and gets caught on branches and trees while navigating dense forests. However, he was very fond of the sheath and it fit his Hori Hori knife perfectly.

Folding Saw

I will mention one other tool that is extremely useful and hard to do without. Folding saws are an excellent tool that are a necessity for anyone doing archaeology in the Boreal forest. There have been countless times where a tree or large branch is totally blocking a cutline that we need to quad down to access our work area. Instead of walking for an extra 3 km, we simple deploy a folding saw and cut the tree out of the way. If I know there will be lots of deadfall, I bring a chainsaw, but sometimes one small tree can mean the difference between a 200 m or a 2000 m hike if you can’t get your quad around it.

The two main types of folding saws we use are the “folding” type and the “collapsible” type. Both of these saws work, but a folding saws is more portable and easy to deploy, whereas a collapsible saw is better at actual cutting. Madeline uses her Kershaw folding saw so much she actually keeps it in her vest. She uses it to clear trails and get those pesky roots out of her test pits. Last year Tree Time bought 4 of the collapsible Agawa Boreal 21 Saws for people to take with them on the quads. We found that these saws were extremely useful, and cut through fairly large trees with ease.

Closing Remarks

When purchasing knives, multi-tools or saws for work, or pleasure, remember to ask yourself “do I actually need this?”, and better yet “do I really want to carry this around all day?”. This is what you have to remember when buying a folding-knife versus a fixed-blade knife, a 7 inch blade versus a 4 inch blade, a 21 function versus 12 function multi-tool or a folding versus collapsible saw. Weight adds up very fast when you have to carry it around for 12 hrs a day, every day, so it is these small choices that make all the difference. You cannot leave your food, water, GPS or first aid kit at home, but you can choose a multi-tool that is 5 ounces lighter, or a knife that fits in your pocket. However, always remember that outdoor living is always a trade off, and conscious well thought out decisions should always guide you when choosing your kit.

Underwater Archaeology – Sanisera Field School

Ever wanted to combine a hobby you enjoy with work you are passionate about, like scuba diving and archaeology? In 2013 Vince and I did just that. Archaeologists tend to be naturally curious people, always wondering “what’s over there?” or “what’s under that?”, so its not surprising that many archaeologists also enjoy scuba diving. There are plenty of opportunities for the public to try their hands at archaeology right here in Alberta (such as at Bodo or Brazeau) but as avid scuba divers Vince and I decided to try our hands at underwater archaeology at a more exotic location.

For two weeks in April-May 2013 Vince and I attended the Sanisera underwater field school at the Cap de Cavalleria on the island of Menorca, Spain.  This field school was conducted by the Ecomuseum de Cap de Cavalleria (now called the Sanisera Archaeology Institute for International Field Schools).  This is a large field school with something for everyone and we met people from all over the globe who shared our interest in archaeology. In addition to the underwater fieldschool, there were two other fieldschools being held on land at the same site. One excavation was taking place at the Roman city (Sanisera), and the other was at one of the seven Roman necropolises located near the city. Our group was underwater investigating shipwrecks in the harbour. The site was diverse and included not only the areas mentioned above but also a Roman military camp which predated the Roman city, a quarry and an 18th century British watch tower.

DSC00501 - Copy

We started each morning by hopping into the van and driving to the dive site. On the beach before diving we would discuss which survey methods we were going to use that day and what our objectives would be (since we couldn’t speak once we were under). Then we would gear up and hit the water. Some days we would have to swim a fair distance before submerging and some days the sea was too stormy (or too many jellyfish) to dive at all.

Four different underwater survey strategies:

1. Snag line – two divers swim in the same direction with a weighted rope pulled tight between them dragging it along the bottom and stopping if it “snags” an object. When an object is snagged the ends of the rope are pinned to the bottom and the divers follow the rope to the object. If it is an artifact they record it, if it is something like a rock they unpin the rope and continue.

2. Circular search – to perform a circular search one end of rope is tethered to something that won’t move (a datum) then either multiple divers can space themselves out along the rope and survey a circle around the datum, or one diver can make multiple circles around the datum moving down the rope with each new circle to cover the same amount of space as the multi-diver scenario.

3. Swim-line search – a linear method, the swim-line search sees divers hold onto a rope to make sure they and maintain a consistent speed and keep their distance between each other as they move together in a line. A tug on the rope indicates that someone along the line found something and for everyone to stay put until it is recorded.

4. Jack-stay search – this type of survey is useful for carefully covering a predetermined area. Two parallel lines are fixed to the seabed (called jack-stays) and a movable rope is laid out spanning the distance between them. Divers then use the movable rope as a guide for their search starting at opposite ends, where it meets the parallel fixed jack-stay lines, and swim towards one another. When finished surveying the ground below the movable rope is adjusted along the length of the stationary jack-stays as the survey progresses slowly working from one end to the other effectively creating temporary survey corridors. When the search is midway through, the rope system will resemble a capital “H”. The two fixed jack-stay lines running parallel to each other form the vertical lines and the movable rope, perpendicular to the other two, would form the middle part of the “H”.

We practiced all of these survey techniques with the exception of the snag line and also practiced mapping artifacts underwater and taking photos. The artifacts we found were mostly amphorae that had spilled out of wrecked cargo ships, but we also found two anchors. We finished our dives around noon, got out of our gear, packed it back into the van and then returned to the Ecomuseum.

62652_10201016614636967_11606336_n[1] - Copy
Once at the museum we would have a debriefing about what we found, compare our notes and maps and have a short lecture. While we were doing this the students from the terrestrial field schools were cleaning and cataloging artifacts. We didn’t collect any artifacts from our underwater survey as keeping them underwater is the best way to preserve them at present. After our short lecture we would sometimes have a longer lecture that all three field schools would attend, these lectures were useful to all the groups as they usually discussed topics such as the history of the site, findings of previous excavations or focused on specific artifact types (for example how to tell where an amphora was manufactured based on vessel shape, temper type or colour of the clay).
We had a few days that we didn’t do any diving, lectures or excavation. On those days all three field schools were taken on tours of the island to visit other archaeological sites relating to the pre-Roman inhabitants of the island – the Talaiotic. We were also taken to the island’s capital city Mahon (Maó) to visit the museum where our instructors gave talks about some of the artifacts on display and we visited the back rooms to see some unique artifacts that were not currently on display. At the end of the field school each student gave a presentation to our specific field school group and to all the instructors.

If you know anyone who is interested in giving archaeology a try it is definitely possible to get your hands dirty no matter where in the world you live. Joining your local Alberta Archaeological Society chapter is the best way to hear about great (and often free or kid friendly!) ways to get involved and to learn from the experts.

DSC00499 - Copy

Continuity – Buffalo and Sucker Lake Region

Before 2013, archaeological survey in the Sucker and Buffalo Lake regions only identified three sites.  In contrast, just 5 km east, in the Logan and Clyde River systems, around 25 sites had been found. This is likely due to the location of developments being surveyed, but it may also reflect older archaeological survey methods.  The dense river systems and the sandy sediments typical to these two areas really increase the archaeological potential.  This means there are numerous sites that have yet been identified by archaeological survey.

research_area - Copy

When Millar Western Boyle and Alberta-Pacific submitted new forest plans for this region, we knew we could improve the archaeological understanding of the area. Over two field seasons we put in 477 shovel tests and surface inspections. We increased the sites in the area by 14 sites!

Not only did we find sites, but we found two artifacts that really help us understand the people who used this area by helping us determine a date and possible trade connections. Two artifacts, one projectile point and one knife, were the most interesting finds of the survey.

  • The projectile point is the base of a dart thrown by an atlatl. This is an older technology than the bow and arrow, used prior to 2000 years ago. The point is likely Scottsbluff style which is dated up to 8,000 years ago. This atlatl dart point is also made of Knife River Flint. Knife River Flint is a very significant material that only comes from a quarry site in North Dakota (over 1300 km away!).
  • The knife is an asymmetrical corner notched siltstone knife. The only known knife typologies in Alberta belong to the Cody Complex; however, unlike this knife, the stems of Cody knives are usually straight and have a flat base. Further research at this site and about this artifact may significantly alter our knowledge about knife manufacture and technology in Alberta. The style may also be representative of a knife style found in other regions of North America which would suggest travel or trade.

Cabins and historic trails were also identified during the assessment. These are from late 19th to early 20th century occupation of the area, possibly associated with First Nation or Metis use and of cultural significance. At site GgOw-10, two cabins were present, one older than the other. We know this because of the way the two cabins were constructed: one with chainsawn logs and the other with an axe. This is indicative of significant, long-term land use in the Buffalo Lake area. At this site, many metal and glass artifacts were also observed, including a wagon wheel hoop, cans, pots, pans, and a cast iron stove. In addition, we identified wagon trails used to travel along between Buffalo Lake and other nearby settlements such as Philomena.

The area is still being used today and remains an area of importance to local First Nations. A prayer tree was identified while surveying a cutblock along a tributary stream. The cutblock was dropped from the harvest plan due to the presence of the prayer tree. The tree was a jackpine with a red and white pieces of fabric tied to the trunk. The prayer tree can indicate an area where a ceremony took place or an area with medicinal plants. A photo of the tree was not included out of respect for Indigenous traditions.

DSCF2012 - Copy
Reid documenting an area near the prayer tree

We always look forward to returning to areas we have surveyed in the past.  Continuous archaeological survey helps us better predict where other sites are likely to be and fills out our understanding of how landscapes were used over time.

Gear Review – Load-Bearing Equipment

Anyone that works all day in the wilderness knows the importance of having a quality piece of Load Bearing Equipment (LBE) that accommodates all the odds and ends that are required of your profession, while being comfortable enough to wear for prolonged periods. LBE comes in a variety of styles, from the standard Cruise Vest, to the more tacticool modular equipment based off military style plate carries and H-harnesses that employ MOLLE attachment systems. Archaeologists at Tree Time Services Inc. have tried and tested a whole gambit of systems over the years, and everyone but a few outliers (Reid loves his cruise vest), have adopted the True North Aero Vest – Wildland as our LBE of choice.

Before I start the review section, there is one important aspect of our job that influences what type of LBE we prefer. We need to carry more gear than can be accommodated by LBE alone, so that a good backpack (30-50 Litre) is a necessity. Even though some people have tried to fit all the required equipment in their cruise vest, you can only fit the bare minimum of what we need to bring, and have to abandon some items that aren’t necessarily required, but are extremely valuable in certain situations. Things like rain gear, extra thermal layers, extra socks, survival kits, extra food and extra water will not easily fit in a cruise vest when it is filled with all the items that are required for archaeological survey in the boreal forest. Also, if you do try to fit all those things in your cruise vest, you will no longer be able to work effectively while wearing it. Furthermore, attaching your screen to your backpack with a bungie cord is arguably the best way to carry your screen for long hikes, and allows you to stow things such as a hoodie or jacket between the screen and backpack. For these reasons, almost every archaeologist at TTSI uses a combination of some type of LBE and a backpack.

The Cruise Vest

Kurt_fully geared - CopyTim_no backpack - Copy

Cruise vests have been around for a long time, are widely available, and come in a variety of colour and materials. In my opinion, they are fine if your profession requires you to be mobile in the field and your profession does not require much equipment. Reid uses a cruise vest made from a plastic mesh and considers this to the best vest as it is durable and breathable. Cruise vests can be expensive ($100+), and even more so if they have an internal frame. Yet they still don’t accommodate all the extra gear needed for adverse conditions. Teresa and Tim have both used the cruise vest with internal backpack frame, but Teresa has since switched to the True North Aero and hasn’t looked back.

  • Pros
    • Comfortable if not carrying much equipment
    • Variety of colours and fabrics
    • Widely available
  • Cons (With no backpack feature)
    • Not enough storage space
    • Very uncomfortable when overloaded
    • Very uncomfortable while riding ATV
    • Cannot wear while digging
    • Secondary HiVis still needed
    • Bad screen attachment
  • Cons (With backpack feature)
    • Less gear retention
    • Uncomfortable with backpack
    • Full pockets impede pack waist straps
    • Not adjustable for winter layers
    • Flimsy and wear out quickly
    • Non-breathable and hot

The Modular Vest

Modular vests have been around since the 1990’s and have generally replaced what was typically referred to as “web gear” by many Armed Forces groups around the world. They employ a Pouch Attachment Ladder System (PALS), also referred to as MOLLE, which allows the user to change what types of pouches they use based on personal needs without changing the base vest. Most modular vests also act as plate carriers (body armour) and allow the user to change their load-out while still utilizing their body armour as a base. Although modular vests are widely available, most are in neutral colours or camoflage and are therefore not suited to working with a HiVis requirement. With hunters in mind, a few companies have produced modular vests that are blaze orange, and thus work as HiVis provided the rules concerning HiVis clothing are not super strict (some companies would not consider any of these options to be sufficient HiVis clothing). Kurt used a modular vest for a couple field seasons, but has since switched to the True North Aero. He provided the following list of pros and cons:

  • Pros
    • Modular and adaptable
    • Very durable
    • Equipment-specific pockets
    • Can wear while digging
    • Very adjustable and can fit winter layers
    • No zippers
    • Super Tacticool!
  • Cons
    • Expensive
    • Most are not HiVis
    • Non-breathable and hot
    • Heavy
    • Bulky
    • Not comfortable with backpacks

True North Aero – Wildland

AeroVest_Urban_Black

True North is a company that primarily produces gear for Wildland Fire Fighters and First Responders. The True North Aero was designed as a primary piece of LBE that could be worn comfortably with a backpack. Although True North makes specific products that compliment the Aero, we at TTSI have found that this particular LBE to work with a variety of backpacks. The Aero has a specific spot for radios, GPS, flagging, tape measure and has a fleece lined pocket that fits a iPad Mini perfectly. Essentially, the Aero can accommodate all the equipment need while actually working, and in conjunction with a 30-50 L backpack, provides all the space you will ever need. A further benefit of using the Aero in conjunction with a backpack is that since all your survey equipment fits in the vest, one does not have to unpack their backpack to survey a target. Kurt was able to obtain several Aero vest in blaze orange, but unfortunately they seem to have discontinued so only the black version is widely available. While wearing the black version, TTSI employees usually opt to wear a HiVis work shirt.

  • Pros
    • Very durable
    • Lightweight
    • Comfortable to wear with backpacks
    • Breathable and cool
    • Fits all survey equipment
    • Holds gear secure
    • Can wear while digging
    • Protected inner fleece pockets
    • Few zippers, but high quality
    • Sheds water and dries out fast
    • Very adjustable and can fit over winter layers
  • Cons
    • Not true HighVis
    • Zippers can get clogged with mud

There are many options when it comes to LBE and like most things, not everyone will agree on what is the best. Reid stands fast as a die hard proponent of the mesh style cruise vest as it is durable, breathable and works well with his system. Similarly, Tim continues to use the internal frame cruise vest even though he has had the option to switch. However, the rest of us archaeologists at TTSI have chosen the True North – Aero as our LBE champion and never looked back. I personally think it will be a very sad day when my blaze orange version finally wears out and I am unable to get a replacement. On that day, I will regrettably don a HiVis undershirt, strap on a black True North – Aero and head off into the boreal wilderness.

Gear Review – Bulldog Spades

As a CRM archaeologist, my shovel is one of my most utilized pieces of equipment. Delicate excavation requires the fine touch that a trowel provides and archaeologists that do a great deal of this type of work are generally very picky about their trowels. Similarly, those of us that spend their days digging test pits in the wilderness, usually have strong feeling concerning our primary excavation tool, the spade.

What people value in a spade changes from person to person, so Tree Time Services Inc. actually has quite a few different types of spades on hand. The TTSI archaeologists that place the highest value on durability tend to gravitate towards the “King of Spades”. While the King’s all steel construction makes it extremely durable. I feel that it is unnecessarily heavy and because it is all steel, there is none of the shock absorption that is provided by a wooden handle. Alternatively, people that don’t feel like carrying a 4 kg shovel around all day usually choose what we at TTSI refer to as “the Grizzly”. Although these shovels are made by a variety of companies, the name typically refers to what people consider a normal garden spade, but are a little more robust than what you will generally get from Home Depot. They are definitely lighter than the King, however, they suffer in the durability department. If too much leverage is applied to the handle they tend to break where the shaft meets the tang, and I personally have “taco’d” (when the blade bends while trying to stomp through a root) more Grizzlies than I can count. Being the gear snob that I am, I went looking for a spade that combines the durability of the King, with the portability and comfort offered by the Grizzly.

20160519_101834 - Copy
Everyone has a preference: Madeline with the Grizzly on the left, Elenore with the King on the right!

My search for the perfect blend of durability and portability ended when I came across the Boys Irish Bulldog! The Bulldog line of garden tools are produced by Clarington Forge (founded in 1780), which is the only forge in England that still makes garden tools. Their tools are hand forged from a single piece of steel, have American ash handles, are powder coated (not painted) and come with a lifetime warranty. In my opinion they are a very good compromise between the durability of the King of Spades and the portability/ergonomics of the Grizzly. While they are not common in Canada, some varieties can be found at Lee Valley Tools, and they have an American distributor that will ship to Canada. Be prepared to phone them though, as their website is not set up to take Canadian orders.

IMAG0143 - Copy
The Boys Irish Bulldog

I purchased my first Bulldog from Lee Valley Tools, and opted to try the standard Garden Spade. I likely would have opted for the Border Spade since it is lighter weight with a smaller head, but I am a taller individual and the border spade has a shorter handle. The Garden Spade is honestly a little heavy for packing around all day long. Although it is not as heavy as the King of Spades, the forged blade and handle are both quite thick. Despite it being a little heavier than I would like, I was still impressed by the craftsmanship and durability of the spade. In my opinion the Garden Spade is far superior to both the King of Spades and the Grizzly.

I was not planning on ever getting another shovel, however I ended up breaking the handle of my prized shovel while Corey and I were trying to scare away two grizzly bears that we crossed paths with. We were making noise by smashing our shovels against trees as hard as we could, and this became the true test of durability. While Corey’s King of Spades had not a scratch or dent, the handle of my shovel broke where it meets the tang. I contacted Lee Valley Tools to try to obtain a replacement handle, however I found out that they don’t even carry them since no one had ever broken one. The lady on the phone was flabbergasted that I had accomplished this seemingly impossible task and was able to put me in contact with the American distributor. After recounting the bear story to the very kind lady on the other end of the phone, and her father, they offered to send me a new handle for free! They also suggested that I try the Boys Irish Spade that they had on sale, as they believed it would be very well suited to my profession. Boy were they right!

IMAG0145 - Copy
Boys Irish Spade

Unfortunately the Boys Irish spade was on sale because it was discontinued, but I was able to get the replacement handle and the Boys shipped from San Francisco for under $90. Although I was skeptical of the traditional “ T ” handle and narrow blade on the Boys Irish Bulldog, I soon fell in love with both of these features. Following the design of an old fashion trenching spade, the Boys Irish is very lightweight and maneuverable while digging small holes like test pits. The long handle makes the shovel very ergonomic for a taller person, however Teresa used the Boys for a shift and she also considered it to be better than both the King and the Grizzly. The “ T ” handle fits well in the hand and adds a historical appearance to the spade. As an archaeologist I find the historical look of the Boys Irish very pleasing. Although the forged blade and ash-wood handle are extremely durable, I don’t think I want to put the Boys up against the King in a tree bashing competition any time soon. In my opinion, tree bashing is the only realm where the King has the upper hand on the Bulldog!

IMG_0576 - Copy.JPG
Brian in action!

King of Spades – https://www.gemplers.com/product/W419/King-of-Spades

Grizzly – http://www.fransyl.com/1-83-79-Garden_Spade_Short_Handle_-_GRIZZLY_productCatalogue.html

Garden Bulldog – https://www.claringtonforge.com/spades/border-spade

Boys Irish Bulldog – https://www.amazon.ca/Bulldog-Premier-Irish-Treaded-Spade/dp/B004NT050O

The Whiskey Jack!

In 2015 a two year poll was issued by Canadian Geographic for a new National Bird.  In the end, our little Grey Jay took the lead, beating out the common loon, black-capped chickadee, snowy owl, and Canadian Goose. Although not officially recognized as the new National bird yet, it was selected as an avian representation of Canadians: its found in every province and territory, it’s friendly, and it’s very intelligent!

Gray Jay Range_FINAL_02_Ocean_Labels - KS
From the Canadian Geographic: https://www.canadiangeographic.ca/article/meet-our-national-bird-gray-jay

For the Cree, the Whiskey Jack, or Wisakedjak, is a shape-shifter, benevolent trickster, teacher, and messenger of the forest. There are many different stories about the Wisakedjak, but most of them have a moral. The appearance of the Wisakedjak in the morning is seen as a good omen, and is believed it warns people of nearby predators.

This boreal forest inhabitant is often spotted by Tree Time’s archaeology crews, and it has quickly become my favourite little bird. They are almost always seen traveling in a group of three: a monogamous pair and a juvenile from the previous year’s breeding season. The friendliest groups have always been found near areas people have made their hunting camps. In fact, the Whiskey Jack has figured out that people mean food. Given a few minutes, some of them may even eat out of your hand!

IMG_0784 - Copy
The Whiskey Jack checking us out! Notice how close it is to our gear.

DSCF1472 - Copy
This camp must have been a popular food gathering place for these Grey Jays. They were very friendly!

Whiskey Jacks stick around all winter too, even incubating their eggs as temperatures dip to -30°C. They store their food in crevices, under lichen, and even under conifer needles. They coat the food in a saliva, called bolus, which makes it sticky, ensuring the food doesn’t move until the Whiskey Jack returns. Unlike forgetful squirrels, these birds will remember exactly where they left their caches! Their food is a variety of arthropods (like spiders), small mammals, ticks, carrion, fungi, fruits, and seeds. The average life span is about 8 years, although the oldest recorded Whiskey Jack was 17 years old!

checking out the truck
These three checking to see if we were going to drop any of our lunch.

What bird would you have voted for?