Underwater Archaeology – Sanisera Field School

Ever wanted to combine a hobby you enjoy with work you are passionate about, like scuba diving and archaeology? In 2013 Vince and I did just that. Archaeologists tend to be naturally curious people, always wondering “what’s over there?” or “what’s under that?”, so its not surprising that many archaeologists also enjoy scuba diving. There are plenty of opportunities for the public to try their hands at archaeology right here in Alberta (such as at Bodo or Brazeau) but as avid scuba divers Vince and I decided to try our hands at underwater archaeology at a more exotic location.

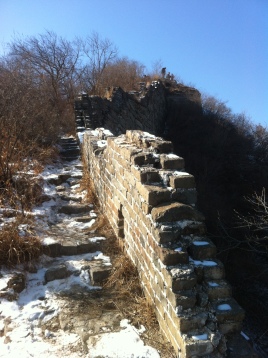
For two weeks in April-May 2013 Vince and I attended the Sanisera underwater field school at the Cap de Cavalleria on the island of Menorca, Spain.  This field school was conducted by the Ecomuseum de Cap de Cavalleria (now called the Sanisera Archaeology Institute for International Field Schools).  This is a large field school with something for everyone and we met people from all over the globe who shared our interest in archaeology. In addition to the underwater fieldschool, there were two other fieldschools being held on land at the same site. One excavation was taking place at the Roman city (Sanisera), and the other was at one of the seven Roman necropolises located near the city. Our group was underwater investigating shipwrecks in the harbour. The site was diverse and included not only the areas mentioned above but also a Roman military camp which predated the Roman city, a quarry and an 18th century British watch tower.

DSC00501 - Copy

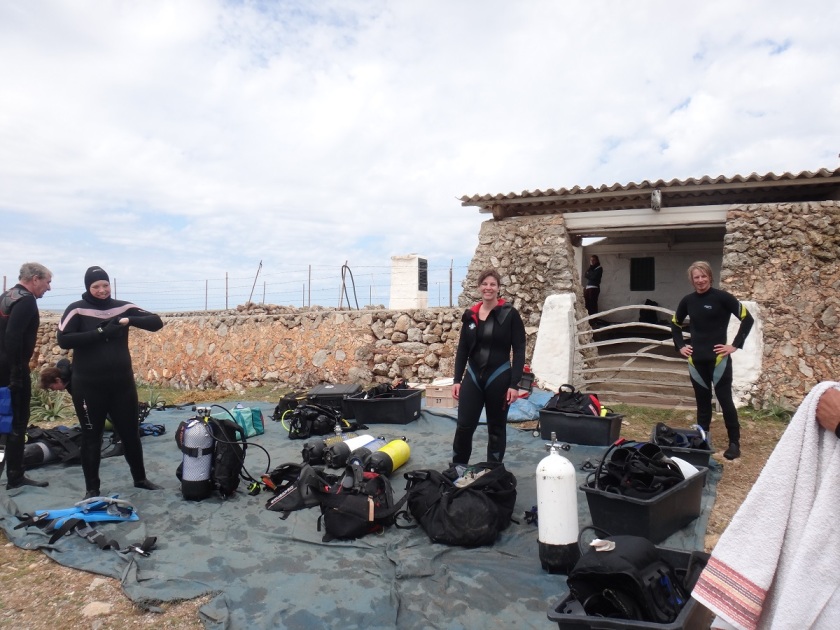
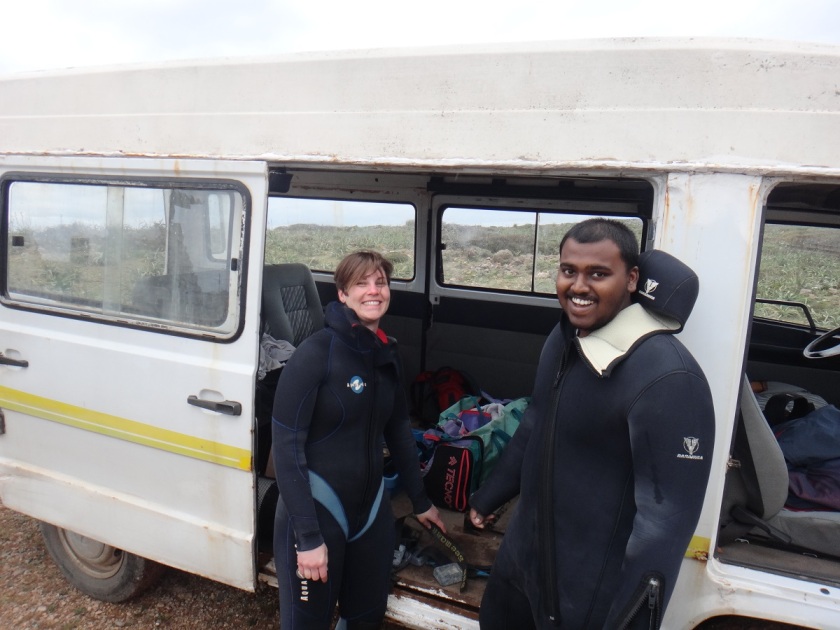
We started each morning by hopping into the van and driving to the dive site. On the beach before diving we would discuss which survey methods we were going to use that day and what our objectives would be (since we couldn’t speak once we were under). Then we would gear up and hit the water. Some days we would have to swim a fair distance before submerging and some days the sea was too stormy (or too many jellyfish) to dive at all.

Four different underwater survey strategies:

1. Snag line – two divers swim in the same direction with a weighted rope pulled tight between them dragging it along the bottom and stopping if it “snags” an object. When an object is snagged the ends of the rope are pinned to the bottom and the divers follow the rope to the object. If it is an artifact they record it, if it is something like a rock they unpin the rope and continue.

2. Circular search – to perform a circular search one end of rope is tethered to something that won’t move (a datum) then either multiple divers can space themselves out along the rope and survey a circle around the datum, or one diver can make multiple circles around the datum moving down the rope with each new circle to cover the same amount of space as the multi-diver scenario.

3. Swim-line search – a linear method, the swim-line search sees divers hold onto a rope to make sure they and maintain a consistent speed and keep their distance between each other as they move together in a line. A tug on the rope indicates that someone along the line found something and for everyone to stay put until it is recorded.

4. Jack-stay search – this type of survey is useful for carefully covering a predetermined area. Two parallel lines are fixed to the seabed (called jack-stays) and a movable rope is laid out spanning the distance between them. Divers then use the movable rope as a guide for their search starting at opposite ends, where it meets the parallel fixed jack-stay lines, and swim towards one another. When finished surveying the ground below the movable rope is adjusted along the length of the stationary jack-stays as the survey progresses slowly working from one end to the other effectively creating temporary survey corridors. When the search is midway through, the rope system will resemble a capital “H”. The two fixed jack-stay lines running parallel to each other form the vertical lines and the movable rope, perpendicular to the other two, would form the middle part of the “H”.

We practiced all of these survey techniques with the exception of the snag line and also practiced mapping artifacts underwater and taking photos. The artifacts we found were mostly amphorae that had spilled out of wrecked cargo ships, but we also found two anchors. We finished our dives around noon, got out of our gear, packed it back into the van and then returned to the Ecomuseum.

62652_10201016614636967_11606336_n[1] - Copy
Once at the museum we would have a debriefing about what we found, compare our notes and maps and have a short lecture. While we were doing this the students from the terrestrial field schools were cleaning and cataloging artifacts. We didn’t collect any artifacts from our underwater survey as keeping them underwater is the best way to preserve them at present. After our short lecture we would sometimes have a longer lecture that all three field schools would attend, these lectures were useful to all the groups as they usually discussed topics such as the history of the site, findings of previous excavations or focused on specific artifact types (for example how to tell where an amphora was manufactured based on vessel shape, temper type or colour of the clay).
We had a few days that we didn’t do any diving, lectures or excavation. On those days all three field schools were taken on tours of the island to visit other archaeological sites relating to the pre-Roman inhabitants of the island – the Talaiotic. We were also taken to the island’s capital city Mahon (Maó) to visit the museum where our instructors gave talks about some of the artifacts on display and we visited the back rooms to see some unique artifacts that were not currently on display. At the end of the field school each student gave a presentation to our specific field school group and to all the instructors.

If you know anyone who is interested in giving archaeology a try it is definitely possible to get your hands dirty no matter where in the world you live. Joining your local Alberta Archaeological Society chapter is the best way to hear about great (and often free or kid friendly!) ways to get involved and to learn from the experts.

DSC00499 - Copy

Rat’s Nest Cave – Pictographs

Last year I visited a very interesting site located near Canmore, AB. The Rat’s Nest Cave is accessible through the touring company, Canmore Cave Tours, and can be visited all year round. With the help of my guide, Brent, I rappelled 18 m into the cave and squeezed through many tight water carved gaps and tunnels. Eventually you reach “the grotto” where you can hang out by a crystal clear pool and several beautiful stalagmites and stalactites.

repelling
Left: Repelling into the cave.  Right: One of the many squeezes you will experience!

Also in the cave are many animal bones dating to approximately 7000 years ago and, although I didn’t see any while on the tour, several stone tools dating to 3000 years ago. One of the most fascinating aspects of the cave are the pictographs located at the entrance of the cave. Inside the cave, are several small rock paintings that indicate the cave was of cultural significance for the First Nations people possibly for thousands of years. My guide also informed me that there are several pictographs on the outside of the cave above the entrance but due to years of weathering they are not visible to the naked eye.

IMG_6045 - Copy
Assemblage of animal bones found in the cave
IMG_6033 - Copy
One of the rock art images inside the entrance to the cave

Luckily, recent advances in technology allow us to digitally enhance rock art paintings. A process called Decorrelation Stretch or simply D-Stretch is currently being used by archaeologists and rock art researchers to enhance even the faintest of pictographs. The process works by increasing differences in hue and stretching the contrast for each colour variance. When D-stretch is used to enhance the image of the entrance of the Rat’s Nest Cave, a series of handprints can be seen going up the wall.

wall above entrance
Left: Normal image of the wall above entrance.  Right: D-Stretch image of wall above entrance
eP4070027c - Copy
One of the handprints isolated (Photo Credit: Jack Brink)

Fort Edmonton Park Expansion

As part of the upcoming expansion of Fort Edmonton Park, an Indigenous Peoples Experience exhibit is being added. The multimedia exhibit will educate visitors about the Indigenous histories and cultures of the Edmonton region in an engaging and interactive way. The exhibit will include an outdoor amphitheatre, teepees, campsite recreations, and an indoor arena show.

FNE - Copy Sandra Green
Conceptual Design of Indigenous People’s Exhibit (subject to change). Photo Credit: Sandra Green.  Featured Image above – Bird’s Eye view of Indigenous People’s Exhibit (subject to change. Photo Credit : Brittany Cherweniuk.

For the purposes of authenticity, the park contracted Corey and Brittany, with another independent contractor, Alexandra Burchill, to do historical research on the Edmonton region during the period of 1600-1850 AD. Their research will be used to inform the exhibit content and educate the interpretive staff. The team analyzed several different source materials including: primary sources, secondary sources, archaeological reports, archival records, and recorded oral histories.

fort_ed_presentation - Copy
The Research Team presenting at Fort Edmonton

The team also took part in a training program for the interpretative staff. Corey, Brittany, and Alex spent two evenings with the Fort Edmonton Park interpreters presenting their research. They also had several artifact reproductions for the staff to touch and ask questions about. Several staff took the opportunity to try ancient tool technologies such as the bow drill and atlatl throwing.

IMG_20170727_181734 - Copy
Corey demonstrating tool use for the Fort Edmonton Interpretive Staff

As part of the research process, Treaty Six Elders were consulted and collaborated with to ensure the accuracy of research and identify areas that conflict with Indigenous knowledge, oral traditions, and culturally sensitive topics. Several stories told to us by the Elders were incorporated into the synthesis report including a story of an Elder that remembered his mother using a sharp obsidian flake to make small incisions on his temples to relieve headaches. We found this story to be an interesting addition to our discussion of the persistence of stone tool technologies after the introduction of European goods.

treaty Lodge - Copy Brittany Cherweniuk
Conceptual image of the Treaty Lodge (subject to change). Photo credit: Brittany Cherweniuk.

The project was a very educational experience for the research team learning a lot about the history of the Edmonton river valley. But more importantly, the project brought us together with many different people, all united by a love of history and respect for the Indigenous past of the place we all call home.

Field School in Southern Italy: Vulture Project

While working on my Master’s in Anthropology at the University of Alberta, I had the privilege of being a member of the Vulture Archaeological Project. During the summers of 2009 to 2012, in the town of Rionero, Italy, I was part of an international team of academics and students attempting to gain a better understanding of this region’s past. The project is named after the dormant volcano, Monte Vulture, at the base of which lies the beautiful town of Rionero.

monte vulture - Copy

This archaeological endeavor was conducted under the direction of Dr. Richard Fletcher, aimed to investigate the Vulture zone of the Lucanian Frontier as a sphere of pre-Roman cultural interaction and Late Roman Stability. The project consisted of an archaeological survey of the region around the volcano and the excavation of a Roman villa (large industrial farm) and its associated cemetery. While the survey aimed to identify important sites in the surrounding area and collect data on land use and settlement patterns from the Early Iron Age to the Late Roman period, the excavation attempted to determine when the site was used, its economic importance, and gain a glimpse into the lives of the people that inhabited it. The project is responsible for recording numerous new sites in the area, and excavating approximately half of the villa (80×40 m). The project was funded through contributions from the Comune of Rionero in Vultur, the Comunità Montana Vultur and from the instruction fees paid by the students attending the field school.

restoration - Copy

excavations - Copy

Although I am not a Classical Archaeologist by training, I was able to apply my skills in a variety of ways.  My pre-archaeological career involved a substantial amount of time in a supervisory role so I started my time at the Vulture Project as a Field Supervisor.  My training in Human Osteology was an asset and I was not only responsible for overseeing cemetery excavations, but also conducting skeletal inventories and primary analysis of the human remains that were recovered. Since archaeological regulations in Italy state that excavated sites must be preserved, I was also in charge of the restoration and preservation of the site’s integrity.  This involved applying mortar and concrete to unearthed structures, and generally making the site presentable by Italian standards.

young brian - Copy

My time with the Vulture Project still remains one of the highlights of my archaeological career.  Although it was no vacation, and excavating in 40°C with no shade will discourage even the most seasoned shovel bum, I feel fortunate and grateful that I was able to experience the beautiful southern Italian countryside and touch its past.  Due to this project, I have friends from all corners of the globe and memories that will last a lifetime.

If you ever want to have a similar experience, I highly suggest that you become involved in an archaeological dig either where you live, or abroad.  Many field schools do not require any previous training, and at many digs, volunteering will only cost the price of room and board.  While traveling, it is actually a very cost effective way to become intimately familiar with a region and become submerged in the local culture.

Biface

A biface is a stone tool that has flakes removed from both sides. It can be used as a knife, scraper, or further worked into a more recognizable tool. The typical biface shape is an oval with slightly pointed ends. The biface on the left was found near Fort Vermilion in 2016.

12 Foot Davis

When we get the chance we like to get to know the communities that we work in and around. One day last year after finishing work in Peace River, we stopped at the 12 Foot Davis memorial site. Henry Fuller Davis earned his nickname not because of his height, but because of a 12 Foot gold claim in Northern B.C. This claimed gained between $12,000 and $15,000. This new found wealth helped him to establish his role as a fur trader on the Peace River. Based out of Fort Vermilion in 1886, he traded in opposition to the Hudson’s Bay Company. Eventually in accordance with his wishes, he was buried in a location overlooking the town of Peace River.

For more pictures and directions to the memorial and scenic picnic area please visit the website below

http://mightypeace.com/places/sights-experiences/12-foot-davis-site/


Julie Nookum, Indigenous midwife

International Women’s Day is March 8th this year. One aspect of this day is the celebration of the social, economic, cultural and political achievements of women. In honour of this day, we’re going to profile a few women from Alberta’s history.

Today I’ll be profiling Julie Nookum. Unfortunately, very little information about Julie Nookum is available in written records. The information I’ve been able to find about Julie comes from fleeting mentions in the memoirs of Mary Lawrence.i

Continue reading “Julie Nookum, Indigenous midwife”

Flores LaDue, First Lady of the Calgary Stampede

International Women’s Day is March 8th this year. One aspect of this day is the celebration of the social, economic, cultural and political achievements of women. In honour of this day, we’re going to profile a few women with ties to Alberta and its history.

We’ll begin with Flores LaDue, the FLOTCS.

11032v
Photo of Flores La Due from Library of Congress.

Continue reading “Flores LaDue, First Lady of the Calgary Stampede”

Visiting the Terracotta Army Museum

In a continuation of our posts in honour of “Mysteries of China” playing at the Telus World of Science for the months of February and March, I decided to look back on my trip to the Terracotta Warrior museum just outside of Xi’an.

We visited the Terracotta Army Museum in the winter of 2014. This was a good time to visit because the crowds were minimal but it was bone-chillingly cold. The Terracotta Army is indoors but there are several large windows and the door is kept open so it is still pretty cold in there too. So bundle up!

1795697_10152367988867868_1139324092_n
Bell Tower in central Xi’an

We took a local bus that you can catch just east of the railway station located north of the city wall approximately 3.5 km north of the Bell Tower. There will be several buses that will take tourists directly to the museum. The ride takes about 45 minutes and will take you to a large parking lot.

There are number of signs that have been translated into English but if you have limited knowledge going into the site it might be a good idea to get a guidebook or hire a guide.

The terracotta sculptures were created to represent the armies of Qin Shi Huang and their purpose was to protect the emperor in his afterlife when he died in 210-209 BCE. The Terracotta army is located east of the large mausoleum for the emperor that is underneath a 76 m tall pyramid-like mound. Work on the mausoleum began in 246 BCE (when Emperor Qin was 13 years old) and required 700,000 workers. This tomb has not been subjected to archaeological excavation as of 2017.

1024px-tomb_of_emperor_qin_shi_huang
Tomb of Emperor Qin Shi Huang (Source: Wikimedia Commons)
img_1487
Statue of Emperor Qin Shi Huang

From the parking lot, you will see a large statue of Emperor Qin Shi Huang, walk toward it and continue walking west (about 15 minutes) until you come Pit 1. When you first walk in to Pit 1 you will be blown away by the number of statues (over 6,000!). In this pit you can see the 11 corridors of warriors placed on pottery bricks separated by rammed earth walls. The corridors had wood roofs that were covered with reed and clay then covered with 2 to 3 m of soil.

img_1491
View of Terracotta Warriors from east side of Pit 1
img_1505
View of the Terracotta Warriors from south side of Pit 1

As you walk around the side of the vault you can get a little closer to some of the recently restored statues. You can also see a sign pointing to the location of well dug by a farmer that discovered the site back in 1974. The farmer was at the museum when I visited and he signed a nice book of photographs that I purchased.

img_1501
View of a close up of the Terracotta Warriors in Pit 1
img_1509
View of the well location in Pit 1

You can exit out of the back of Pit 1 and continue to Pit 3 which is a much smaller vault with one chariot and several high-ranking officers.

img_1558
View of a war chariot and warriors in Pit 3
img_1561
View of several high ranking officer statues in Pit 3

Exit to the east and continue to Pit 2. In pit 2 the soldiers have not been restored as in the other pits.

img_1553
View of Pit 2

Once you are done with the main excavation pits you can go two exhibits on either side of the main courtyard. These are the Exhibition of Ancient Weapons to the north and the Bronze Chariot Exhibition Room to the south. In these rooms you can get a little closer to the artifacts (but they are behind glass of course) to see the little details. You can see some pieces that still have the paint intact.

img_1521
Intact paint on Terracotta Warrior heads

I was also unaware of all the non-military types of statues that existed. There are more than just warriors and archers that have been found. The emperor also wanted his entertainment and servants in the afterlife. There are Terracotta statues of musicians, acrobats, and women as well.

img_1525
Musician statue
img_1523
Acrobat statue
img_1548
Statue of a woman

You can also see the Bronze Chariot at this exhibit.

1016354_10152367987427868_1861533487_n
Bronze chariot

They also have a really good exhibit that educates the public about the archaeological processes of excavating, conserving, and restoring the Terracotta statues.

img_1519
Two children learning about artifact illustration and photography
img_1527
Display about excavating and mapping features

After we were done exploring the museum and pits we headed back to our hostel (Xian Shuyuan International Youth Hostel) where we had some hot showers and then we headed down to the Terracotta Warrior themed bar in the basement and drank some China beers.

Check out our previous post about the Great Wall of China if you want to learn a bit more about visiting China’s famous archaeological sites.

Visiting the Great Wall of China

In honour of the Mysteries of China IMAX series currently playing at the Telus World of Science, I decided to look back on my trip to the UNESCO World Heritage Site in February of 2014.

We took a tour to Mutianyu organised by our hostel in Beijing. This portion of the wall is in a mountainous region running southeast to northwest for 2.25 km. It takes about 1.5 hours to get to this section of the wall from Beijing. While you are on the bus the tour guide will take the time to tell you a bit about the history of the wall.

For those who don’t know, The Great Wall of China is several sections of a 21,196 km wall made of brick and stone along the northern borders of China to serve as fortifications against northern invaders. The wall was built over several centuries from the 7th century BC until the Ming Dynasty (1369-1644), first using rammed earth and locally sourced stone and later using bricks

img_1796
View of the Great Wall

February is a good time to go because there were basically no crowds besides our tour group and, as a result, there were very few hawkers trying to sell us souvenirs. However, there were still a few touts but they are useful for getting snacks and water while you are hiking the wall. The only negative about visiting during this time of year was that it was a little chilly and we didn’t get the lush green vegetation and vibrant flowers.

1964785_10152367989917868_1673874143_n
View of one of the vendors along the restored section of Mutianyu

.

img_1720
Taking the chair lift up to the Great Wall

The bus will take you to the parking lot, where you will have to walk a few hundred metres to the group ticket gate. From here you can choose to either hike up to the wall or you can take the chair lift. Our tour guide told us that hiking once on top of the wall is challenging enough so we decided to conserve our energy and take the chair lift up. From here you will have great views of the surrounding mountains as your excitement grows as get nearer to the top. 

img_1736
Some nice views from the chair lift

Once you get off the chair lift you are at Tower 14. You can turn left and head northwest towards Tower 23 which is the highest point at this section of the wall. This portion of the wall is all restored and is very steep. It is mostly uphill and there are a lot of steps that a predominantly uneven. You will see several watch towers, cannons, and buildings. The restored portions of the wall are pretty cool but after awhile it gets repetitive. 

img_1758
View towards Tower 23 from Tower 14
img_1798
View of one of the cannons

We worked our way back southeast toward Tower 14 and continued in that direction to get to the unrestored portion of wall. It is a bit of a hike to get to the unrestored area of the wall but it is not as steep as the previous section. This portion of the wall won’t be for everybody because it is covered in trees and many of the towers and wall sections are crumbling. I really enjoyed it as an archaeologist, it is a nice contrast to see the difference.

img_1788
View of an unrestored tower
img_1781
Unrestored portion of the wall with vegetation growing on top

Click here to view a video taken at a peak along the unrestored portion of the wall

After about an hour or so here we headed back west. When you reach Tower 6, you can take a toboggan track back down to the ticket gate. This was really fun but we ended up getting stuck behind a guy who either had a malfunctioning toboggan or didn’t know how to work it. Once we reached the bottom we reconvened with our group and had lunch and some beers before heading back out to Beijing.

Click here to view a video of toboggan run

Stay tuned for another blog post about my visit to the Terracotta Warriors.